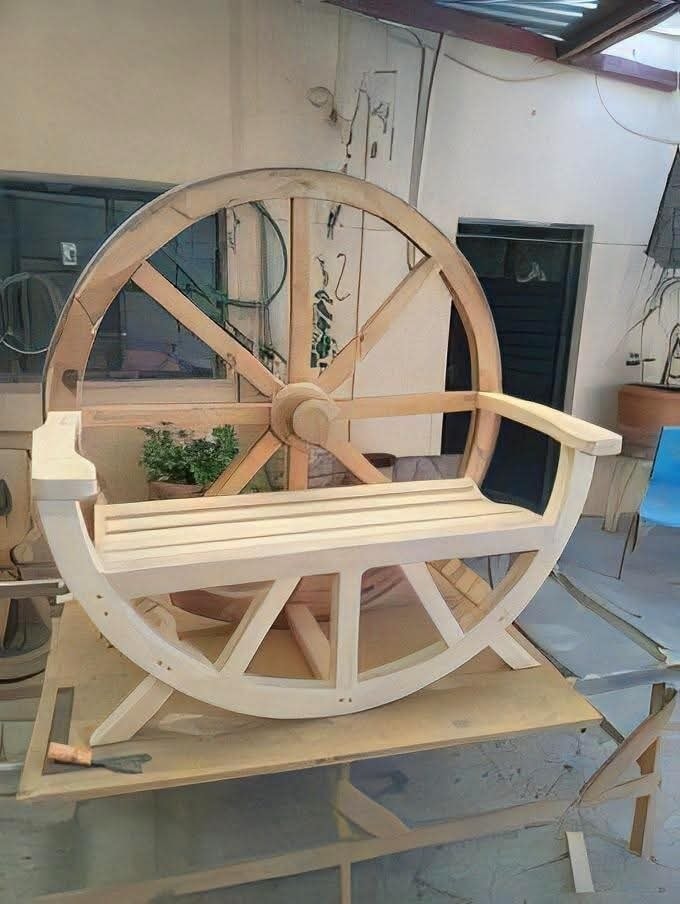
This guide provides detailed, step-by-step instructions to help you build a rustic wooden bench using a wagon wheel-inspired design. It’s ideal for adding charm to gardens, porches, or cozy nooks. With just basic tools and carpentry skills, you can create a durable, beautiful piece of functional furniture.
Looking for more woodworking ideas? Explore: The World’s Largest Collection of 16,000 Woodworking Plans.
Parts List
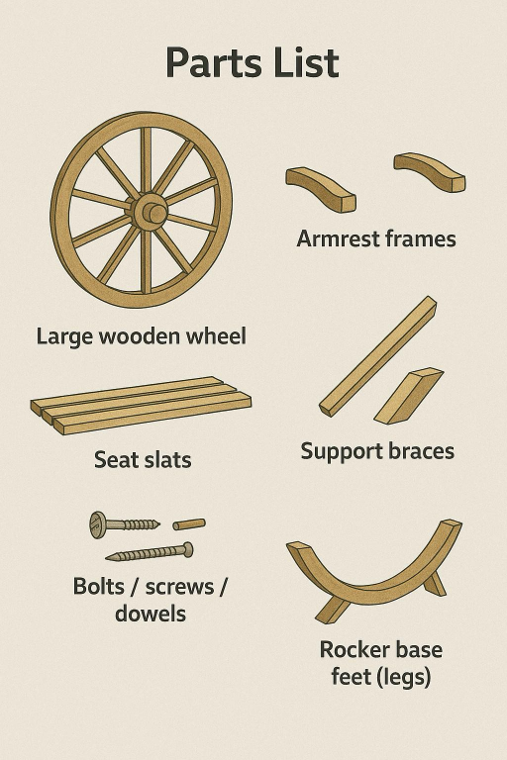
To build this wooden wheel bench, you’ll need the following parts:
- 1x Large wooden wheel (36-48″ diameter, with spokes and a center hub)
- 2x Armrest frames (symmetrical, curved wooden sides)
- 4-6x Seat slats (approx. 2″ wide, 1″ thick, 24-30″ long)
- 2-4x Support braces (angled or straight, depending on design)
- 2x Rocker base feet (curved legs for rocking stability)
- Screws, bolts, or dowels (for joining components)
- Wood glue, sandpaper, optional wood finish (stain/sealer/paint)
Want to explore more advanced woodworking projects like this? Check out: The World’s Largest Collection of 16,000 Woodworking Plans
Step-by-Step Instructions

Step 1: Build or Prepare the Wheel
Use a pre-made or handcrafted wooden wheel. Ensure the center hub is sturdy. Sand all surfaces.
Step 2: Attach the Armrest Frames
Align both armrest pieces to the outer rim of the wheel and secure them with screws or bolts.
Step 3: Install the Seat Slats
Place slats evenly between the armrests and fasten with wood glue and screws. Ensure level alignment.
Step 4: Add Support Braces
Attach support braces beneath the seat from slats to the wheel spokes for reinforcement.
Step 5: Attach Rocking Base Legs
Fix curved rocker pieces beneath both sides of the wheel and ensure balance for smooth rocking.
Step 6: Finish the Wood
Sand thoroughly and apply your desired wood finish. Let it dry completely before use.
Final Tips
- Clamp parts tightly when gluing to ensure strong bonds.
- Ensure symmetry in both wheel halves for balanced rocking motion.
- Sand all surfaces smoothly before applying any finish.
- Test the bench’s strength before regular use.
Need more outdoor project ideas? Visit: The World’s Largest Collection of 16,000 Woodworking Plans